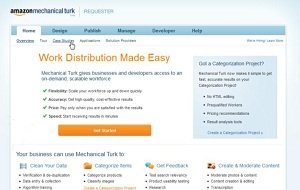
 When you successfully signed up to the amazon Mechanical Turk service, this is the starting point you will see. Take the time to look at the case studies and read the suggestions at the bottom to see what sorts of jobs are best done on Mechanical Turk.
Personally, I have only used it for two different services:
- Content creation and editing – I wanted genuine stories as well as rewriting on some low quality content.
- Data entry jobs – but I prefer other services like oDesk for that.

You will need to go through these steps i.e.
- Design,
- Publish and
- Manage
to successfully set up and complete jobs (or “HITs”) on this service.
Step 1: Design Your Job Posting
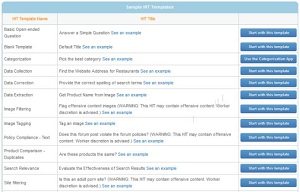 The job description formats are mostly provided by pre-filled templates that you can find under “Design” of this window. Just choose the template which best describes your job. If you are not sure, start with the “Basic Open-ended Question” if you are looking for content creation by workers on Amazon Mechanical Turk. This is what I use most of the time. After you give your template a name, which will be only for your use to find different jobs for reposting, you need to think hard about a descriptive title.
- It really should attract high quality workers
- It should be as concise and descriptive as possible.
Take a look of this title:
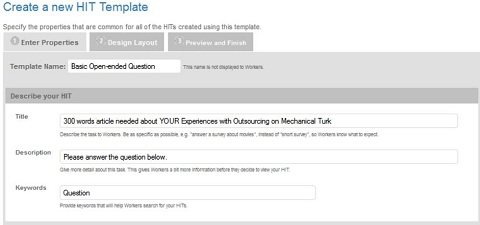
I tried to make it alluring to the workers and I put the most important info right at the beginning of the title: What are they in for? They need to write 300 words. People who are not looking for this job will click away immediately. Only interested workers will look at your job. Don’t worry! The work force behind Amazon Mechanical Turk is huge. You can afford to set the standards as high as possible. This will make it easier later to screen through the results.
Step 2: Write out a short but informative instruction summary
In the description field, be more specific than in the title field. Look at the beginning of my description; it can be a little longer than one line, but don’t make it a whole essay. You will have some place to write a very exact description later when you design the layout. In the “Keywords” field put some keywords which describe the skills you are looking for. Take a look at what I wrote. I specified that the HIT is about writing and that I only need workers from the US.

Why? In my personal experience, I got the best results when I limited the jobs to workers from US only. I have had some excellent cooperation with workers from all around the world with other outsourcing services. But on Amazon Mechanical Turk, personally I got the best content written by people from the US.
Step 3: Planning the Deadlines
Give your workers some time to work on your HIT. Depending on how fast you want the results and how long the task is. For a small writing job, three days are fine. I never have given any worker on Amazon Mechanical Turk less than one day to work on a task and I only check my results once a day. Give yourself enough time to review the results after the HIT is complete. Make it 10 days.
 There is an option to pre-screen the workers for their skills before you let them work for you.
I always left this option as it was without any problem.
Step 4: Carefully screen for the best workers
In the field “Additional Qualifications,” it is where it gets interesting. Take a look at the standard options. Now take a look at how I changed the qualifications to get
- high quality workers
- which are not newbies
- and are native English speakers
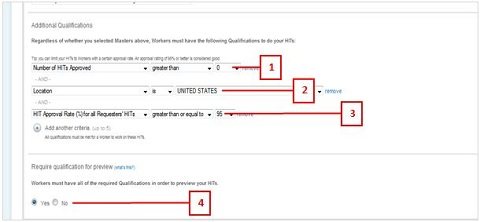
Let’s go through the options one by one.
- In the first field, put the numbers of approved HITs to “higher than zero”. This means that this person has at least successfully completed one HIT before he can even apply to yours. This will keep out most of the newest newbies.
- Limit the location to “United States” . Visitors from all other countries will not be able to view to complete your HIT.
- Also, make sure that your approval rate for the requesters is greater than at least 90%. This HIT approval rate is the feedback score from the workers. The better the feedback score, the more trustworthy the workers.
If you feel that your results are too poor, feel free to increase the number of approved HITs (1) while keeping the HIT approval rate high (3). This really will only give you the most qualified workers. The only risk: Perhaps you will not find enough prospects to do your work. And the last and most important action, click here (4) on “Yes” to require a worker to fulfill all qualifications before he can do your work (or “HIT”). To change the additional qualifications, you can simply add more options by clicking on the little “+”.
Or remove any of the options by clicking to the remove link until you have the profile of the worker that you want for your job. It’s your money. Don’t just let everyone do the work for your business.
Step 5: How much money do you want to spend on Amazon Mechanical Turk?
Finally, it’s time to think about the money. Of course the Amazon Mechanical Turk service is not completely free. You will pay
- the money that you promised the worker
- plus a 10% fee which goes to Amazon Mechanical Turk.
Take some time to think about how much you will pay for a specific task. Calculate the time it normally takes to do the task. What hourly wage would come out? And then think about if this is appropriate. In my personal experience, putting high qualification expectations and promising $0.80 for a well written article about a personal experience from a worker worked out really well. When I asked for 300 words, I get results from 250 to in some cases up to 800 words. Some workers really try their best! In the field below, put the number of people who need to work on your assignment. If you only want one result keep “1”.
 Think about that the final cost will be the product from those two parameters. Make the 3rd option a high number, perhaps 14 days. You will have 14 days to review your results. If you forget about it they will automatically be approved in two weeks. You shouldn’t do that. You risk paying for bad results.
Step 6: Write out unmistakable, clear and precise work instructions
Use this design layout formatting tools to write a good description.
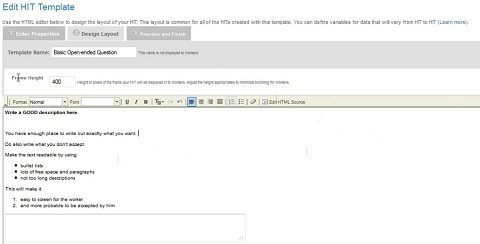
Of course you need to fill in your own descriptions here. Only you know what work you will want to have done. When you are ready to have a final check, click “Preview and Finish.” Your template will be saved and you can reuse it later when you need another similar job to be done. You just have to make the edits needed and then you will be good to go. This is how it looks like. Below you can see where the worker can write his answer.
Sometimes a worker on Amazon Mechanical Turk can be a little bit confused. Make it easy for them. Write clearly something like: “Please use the box below to submit your answer to this HIT” Here is another helpful technique: You can let them know that you will check content for plagiarism. Here is an example description of a HIT I use myself. Note how specific I was.
Step 7: Enjoy and review your outsourced results!
In the “Manage” field you review each entry one by one, paying it by clicking approve or denying it for example if there is some plagiarism going on. It is that easy.


 We’ll cover two different histories:
 Personal development and all creative to crazy ideas about life have always been alluring to me. No wonder I devoured Ferris’s book in half a day.
